Quick Start
This 5-minute tutorial helps new developers get started with AirCode. By following these steps, you'll learn how to:
- Create an AirCode app, and develop and debug cloud functions online.
- Deploy a Hello World API online, and invoke it using HTTP.
To run an example, click Run below.
Create an App
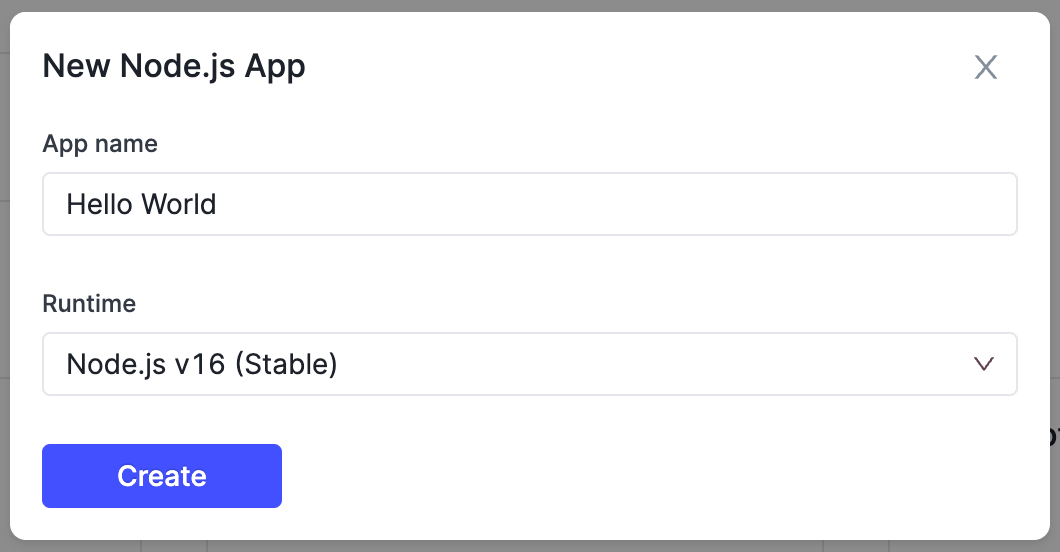
Sign up and log in to AirCode Dashboard, click + New Node.js App, and enter the app name in the pop-up window.
For example, you can create an app called
Hello World.
After creating the app, AirCode will redirect you to the app page, where you can complete the development, debugging, and deployment.
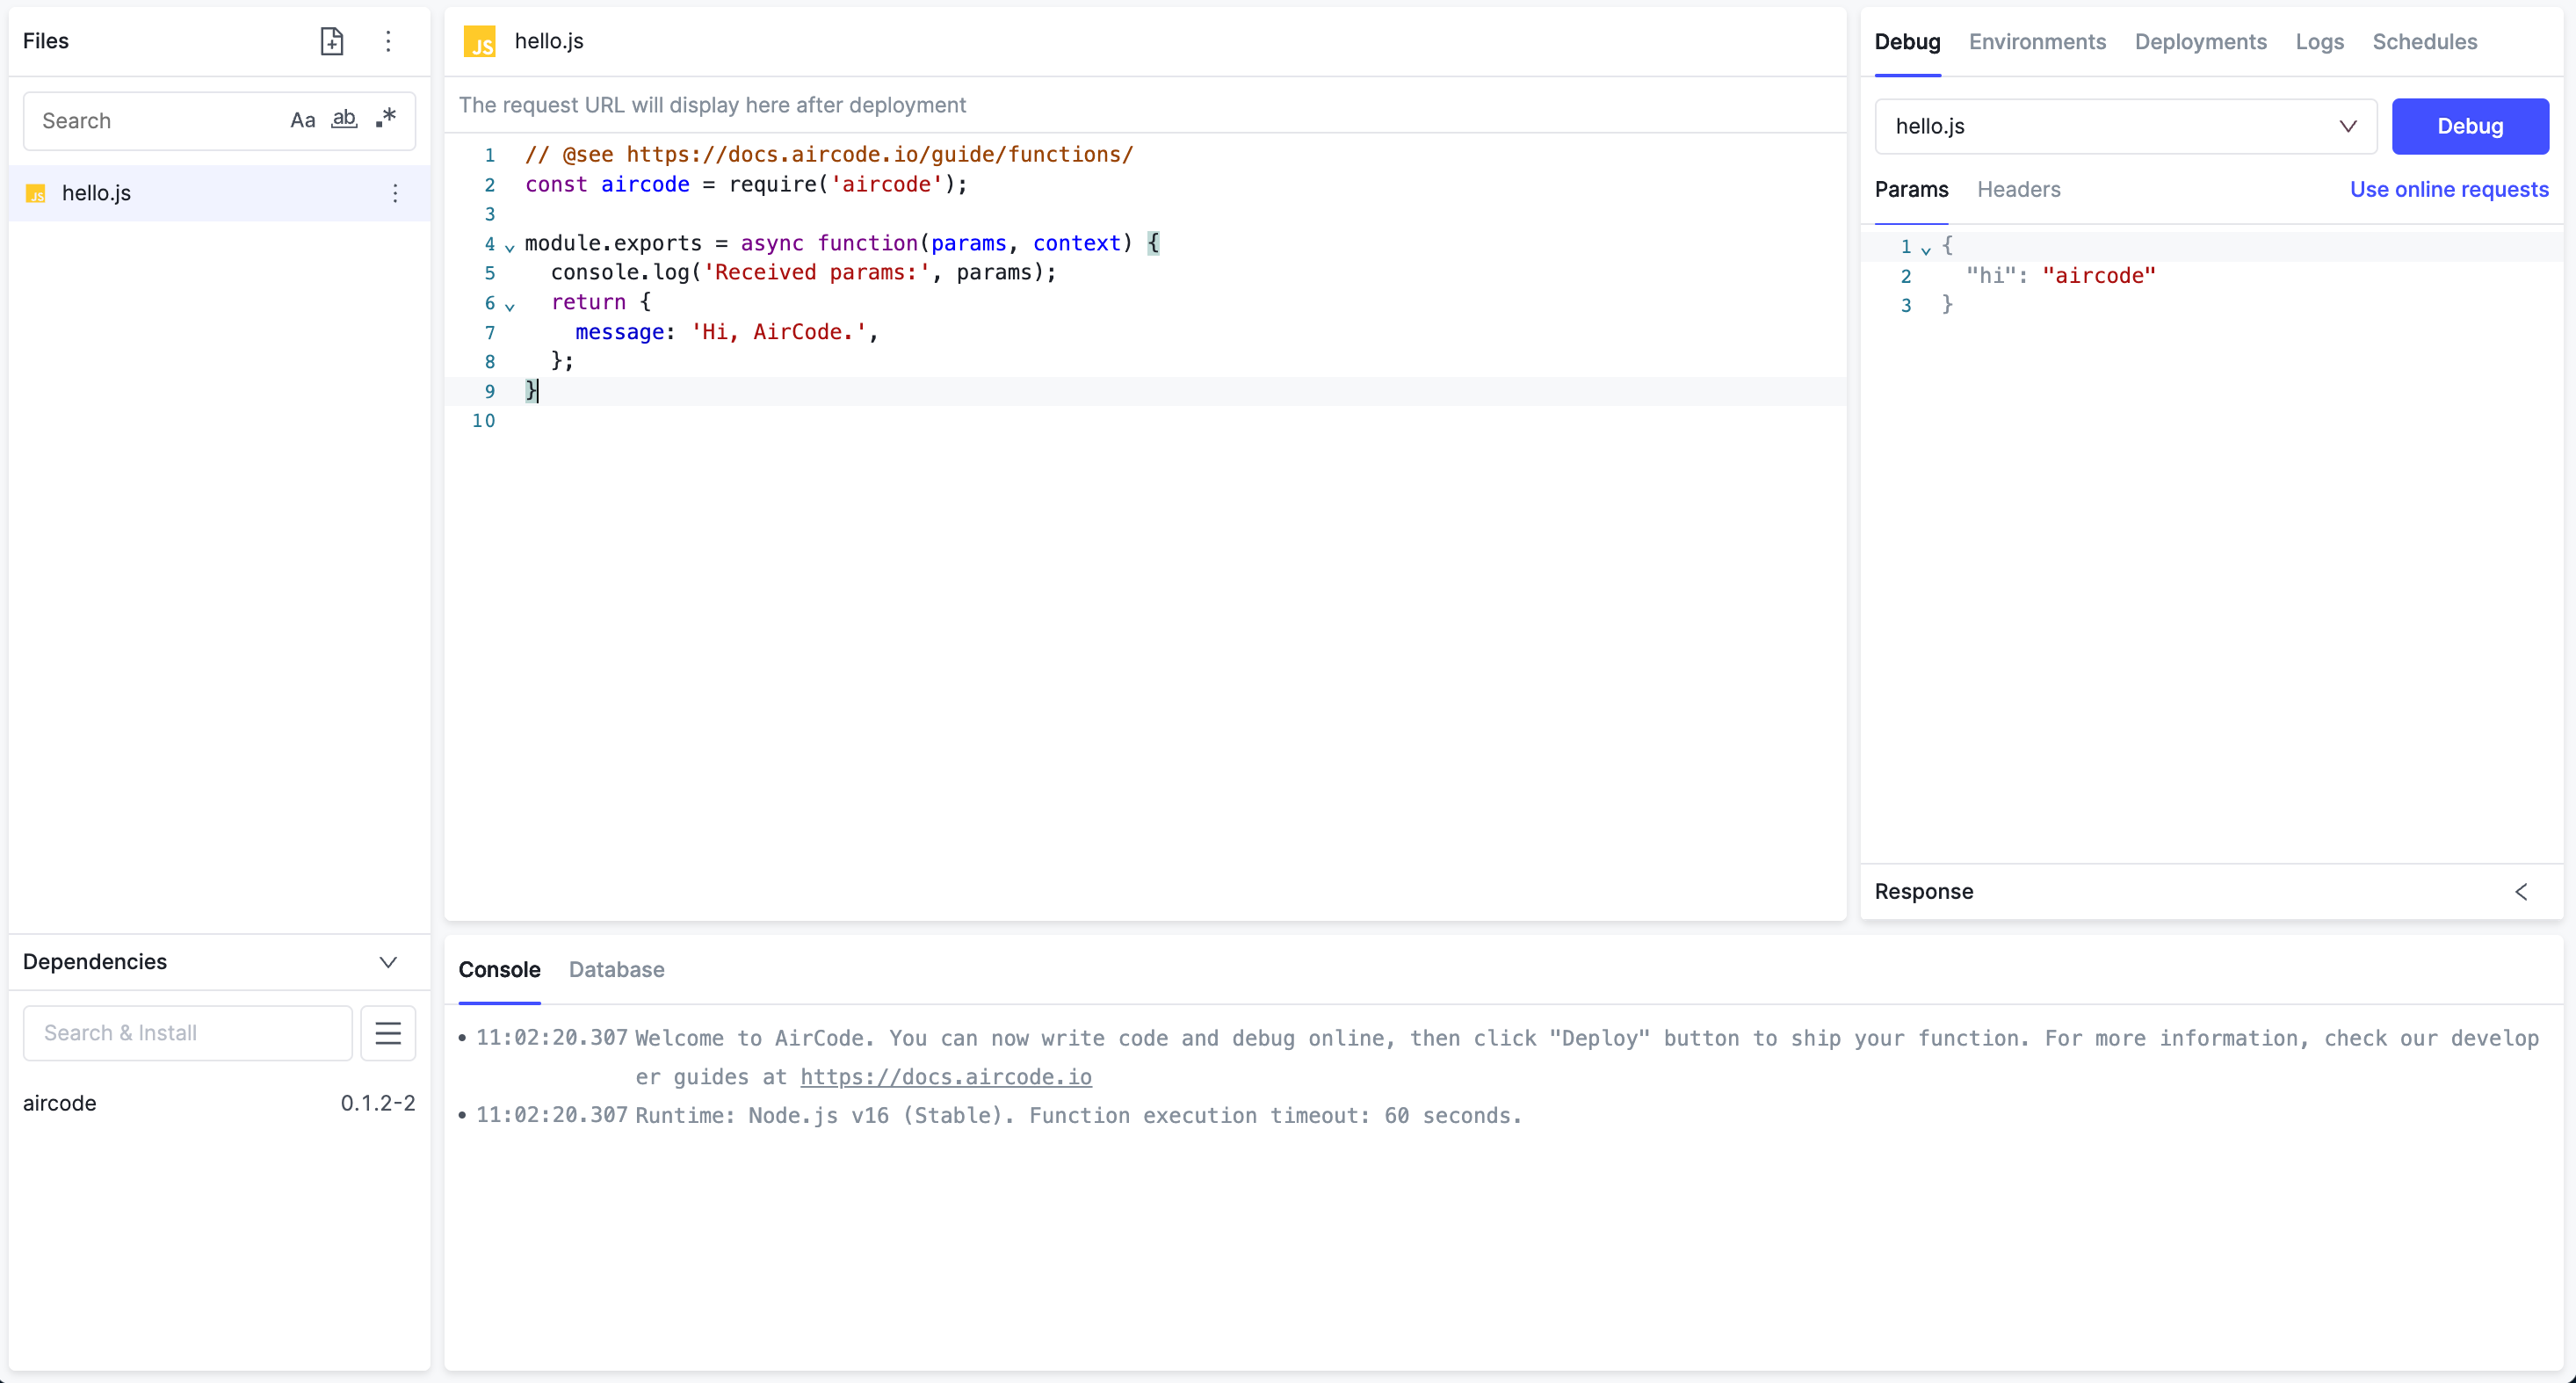
Create a Function
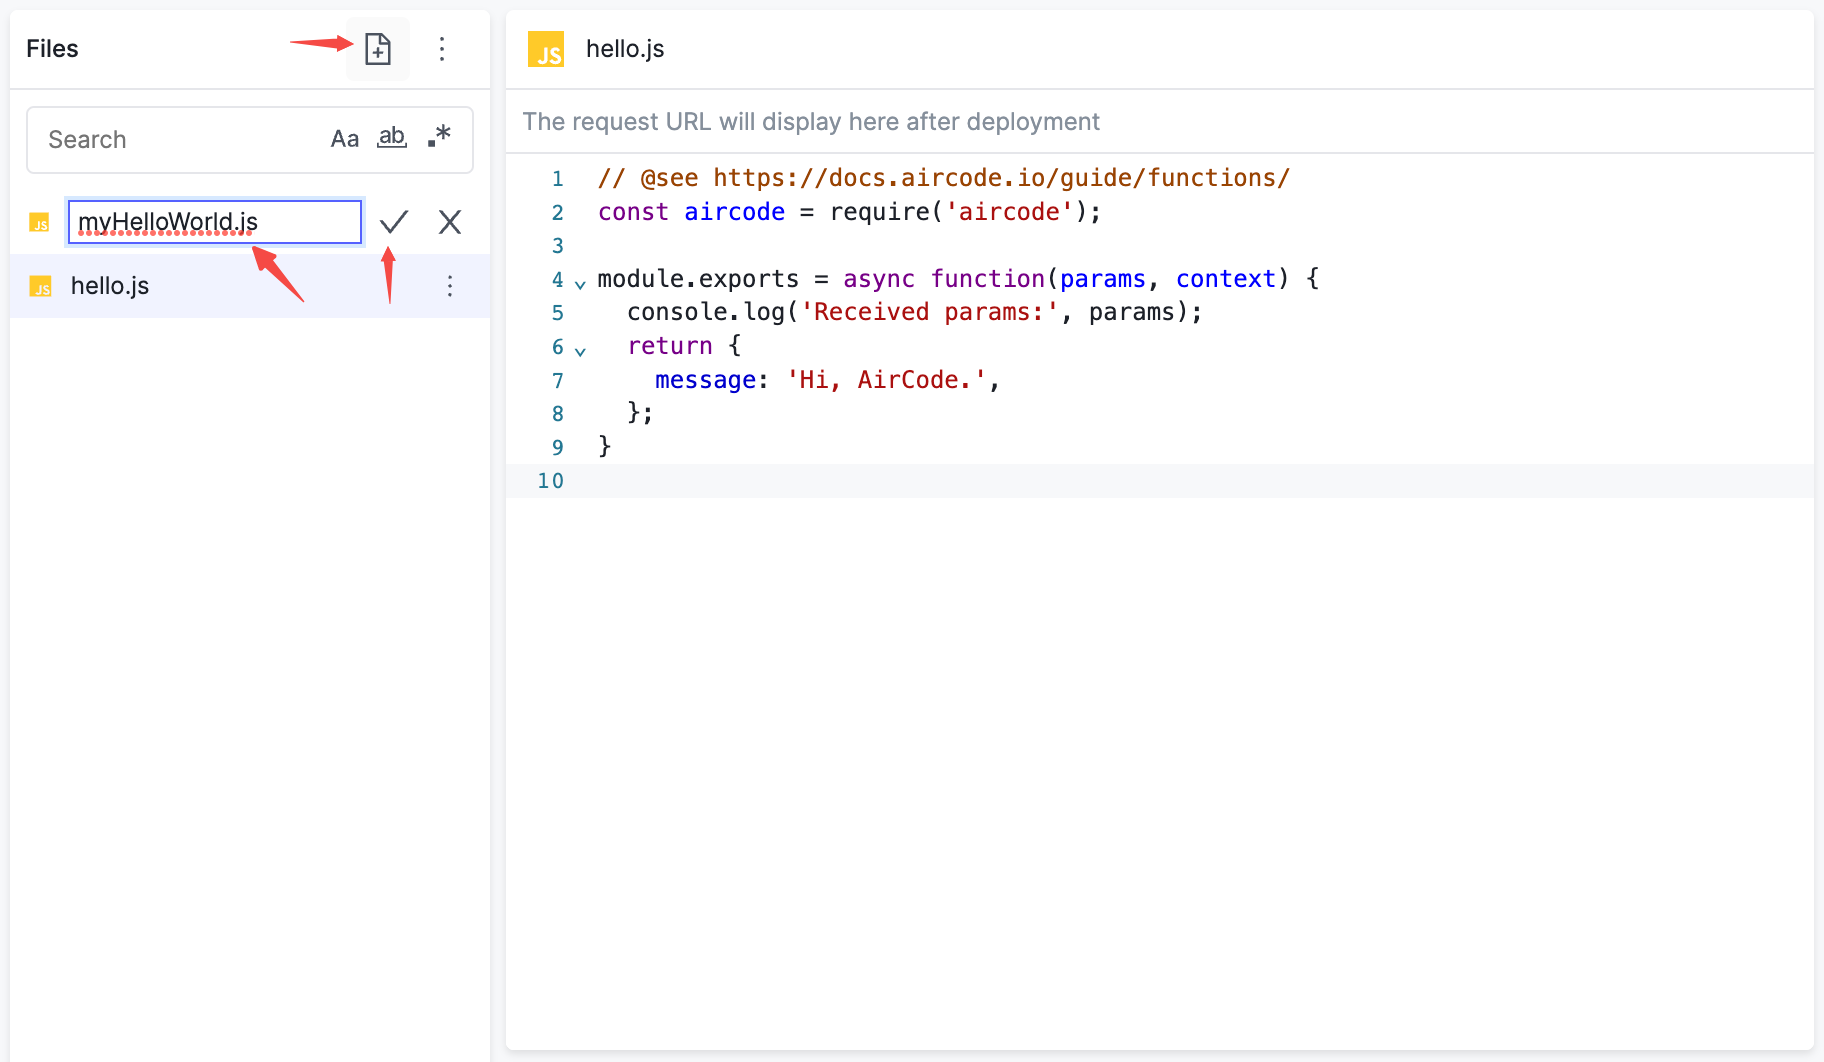
Every new application comes with a default cloud function named hello.js, or you can create your functions. Click the + button, enter your function's name, and click ✓ to finish the creation.
For example, you can create a cloud function named
myHelloWorld.js.
The created function will contain an initial code, which you can modify.
const aircode = require('aircode');

module.exports = async function(params, context) {
  console.log('Received params:', params);
  return {
    message: 'Hi, AirCode.'
  };
}
const aircode = require('aircode');

module.exports = async function(params, context) {
  console.log('Received params:', params);
  return {
    message: 'Hi, AirCode.'
  };
}
Debug a Function
AirCode's online debug tool makes it easy to see running results and modify code during development. Follow these steps to debug a function with AirCode.
First, modify the function as follows:
const aircode = require('aircode');

module.exports = async function(params, context) {
  console.log('Received params:', params);
  // Return the payload passing by params
  return {
    message: params.payload,
  };
}
const aircode = require('aircode');

module.exports = async function(params, context) {
  console.log('Received params:', params);
  // Return the payload passing by params
  return {
    message: params.payload,
  };
}
In the Debug area on the right, modify the content of the Params to the following JSON string:
{
  "payload": "Hello, Micheal!"
}
{
  "payload": "Hello, Micheal!"
}
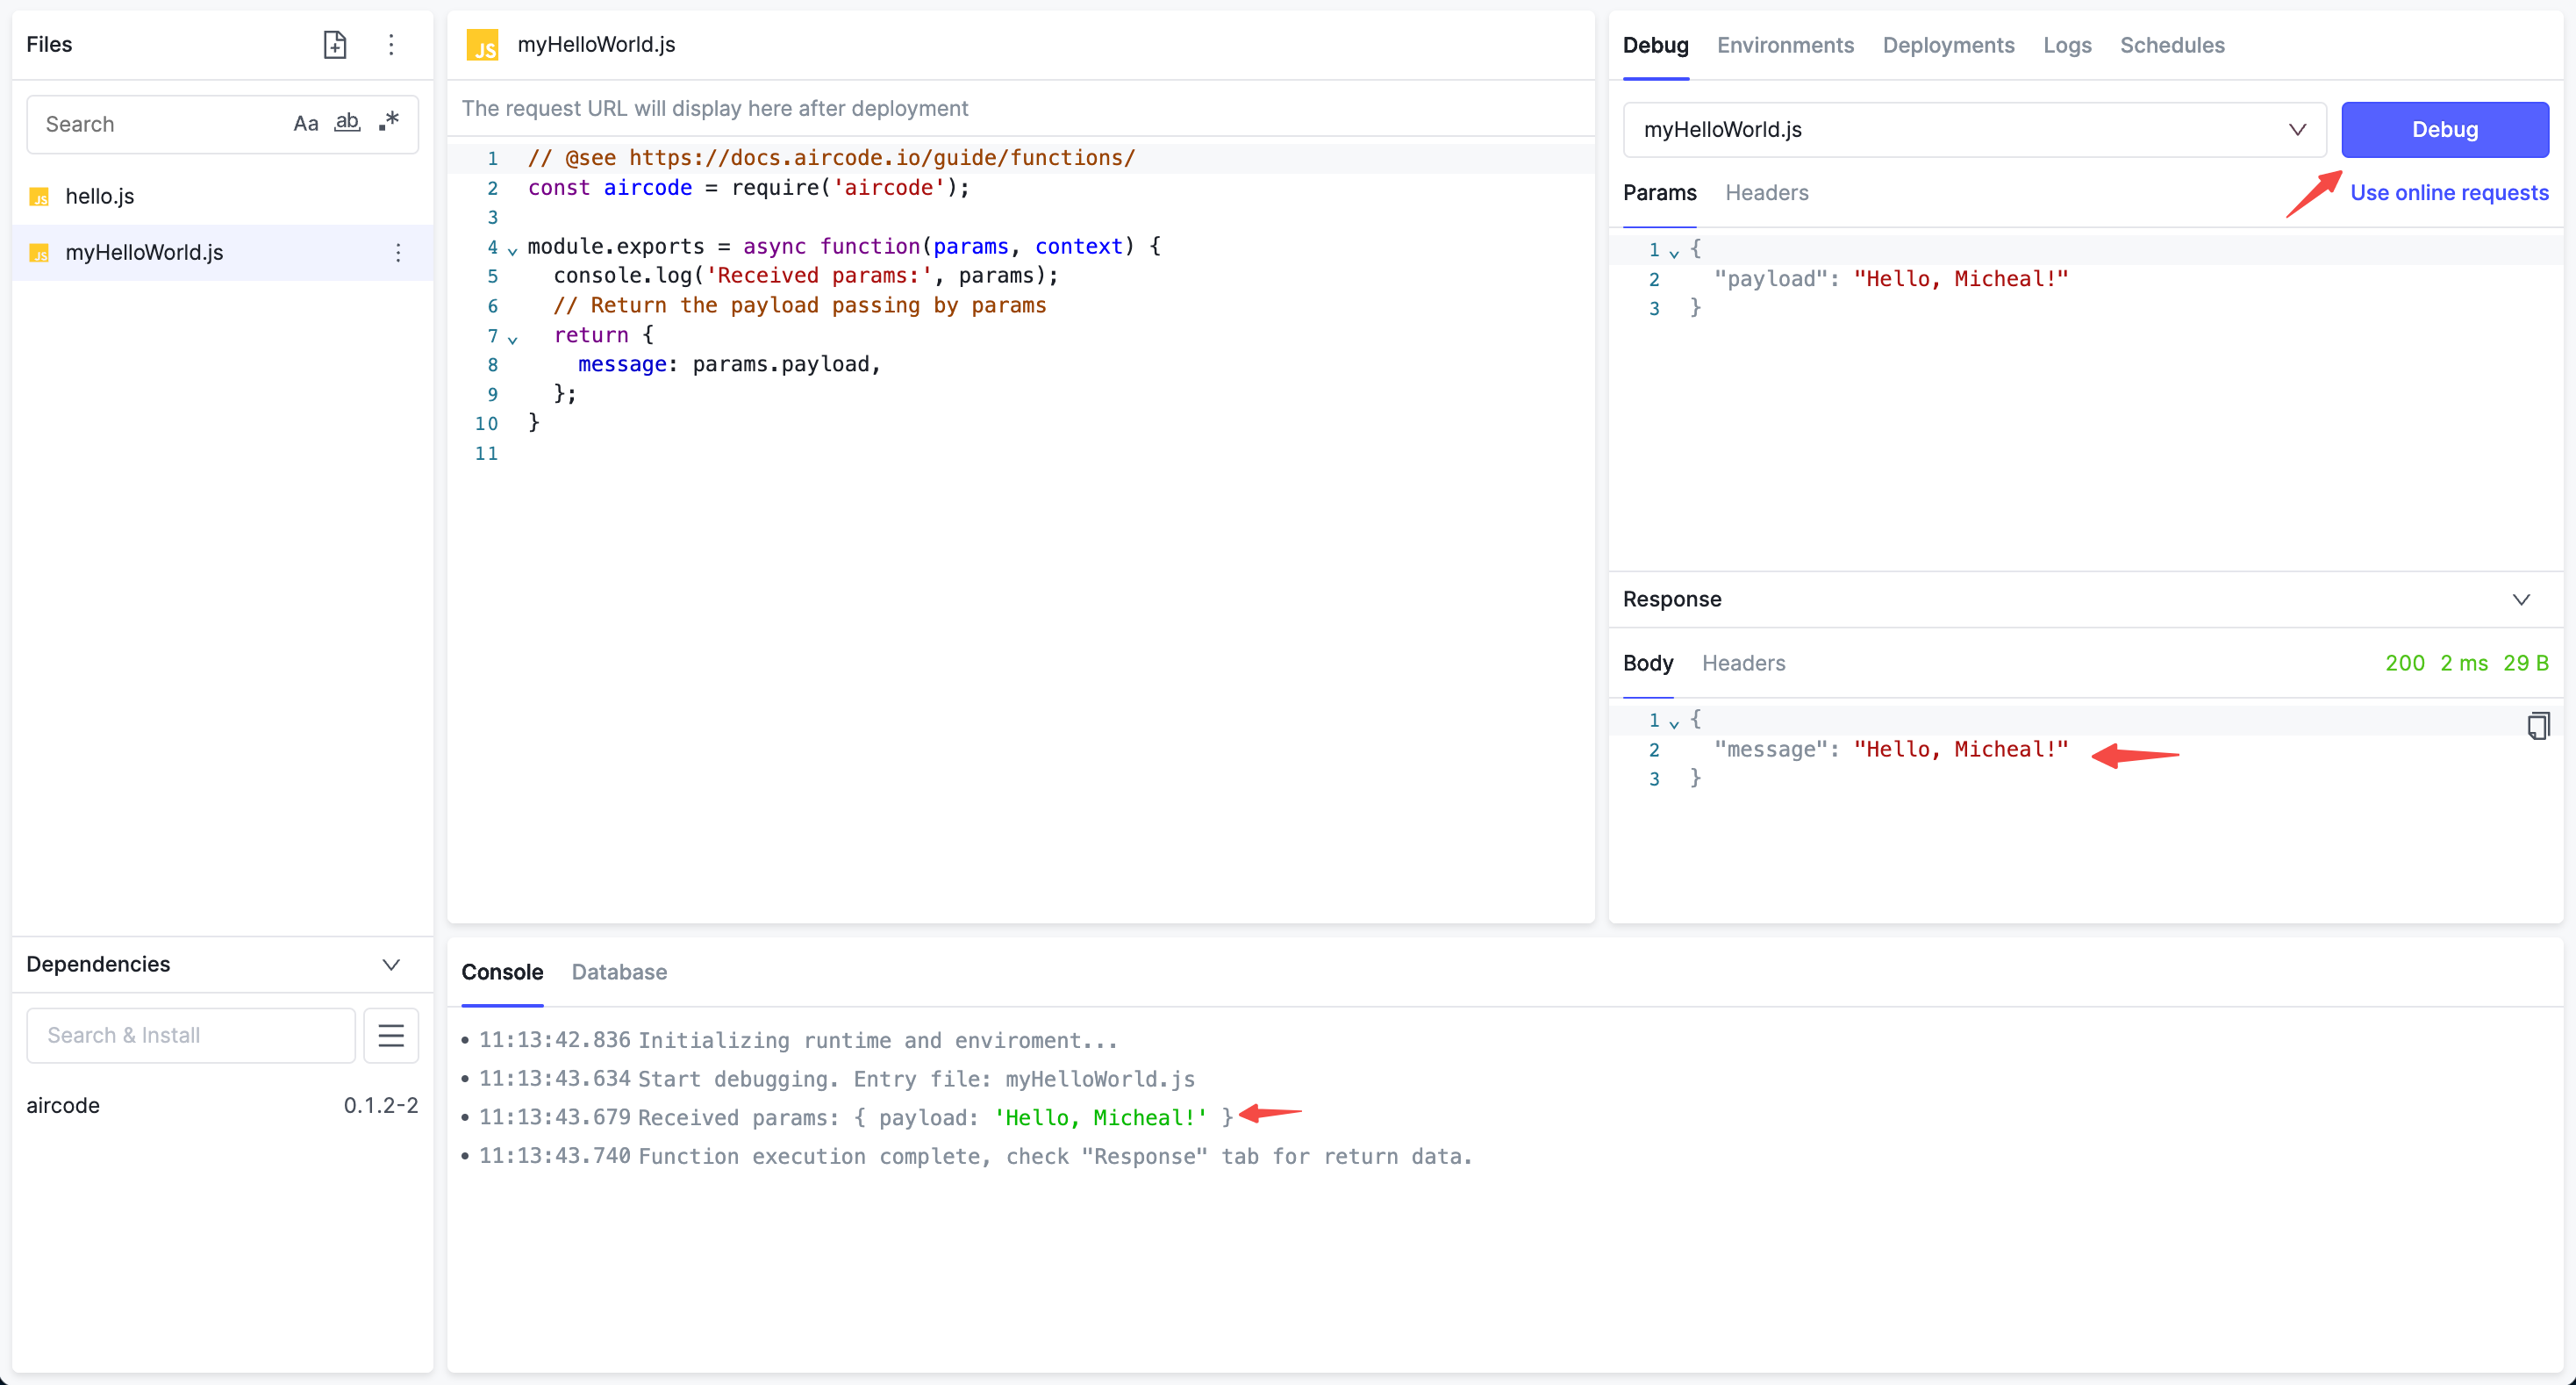
Click the Debug button to send the request to the function myHelloWorld.js. The JSON string of the Params will be passed to the function as a parameter, which can be obtained in the function through the params field.
You can see the return message of the function in the Response area:
{
  "message": "Hello, Micheal!"
}
{
  "message": "Hello, Micheal!"
}
In the Console area, you can see the log output through console.log when the function is running:
18:24:30.237 Received params: { payload: 'Hello, Micheal!' }
18:24:30.237 Received params: { payload: 'Hello, Micheal!' }
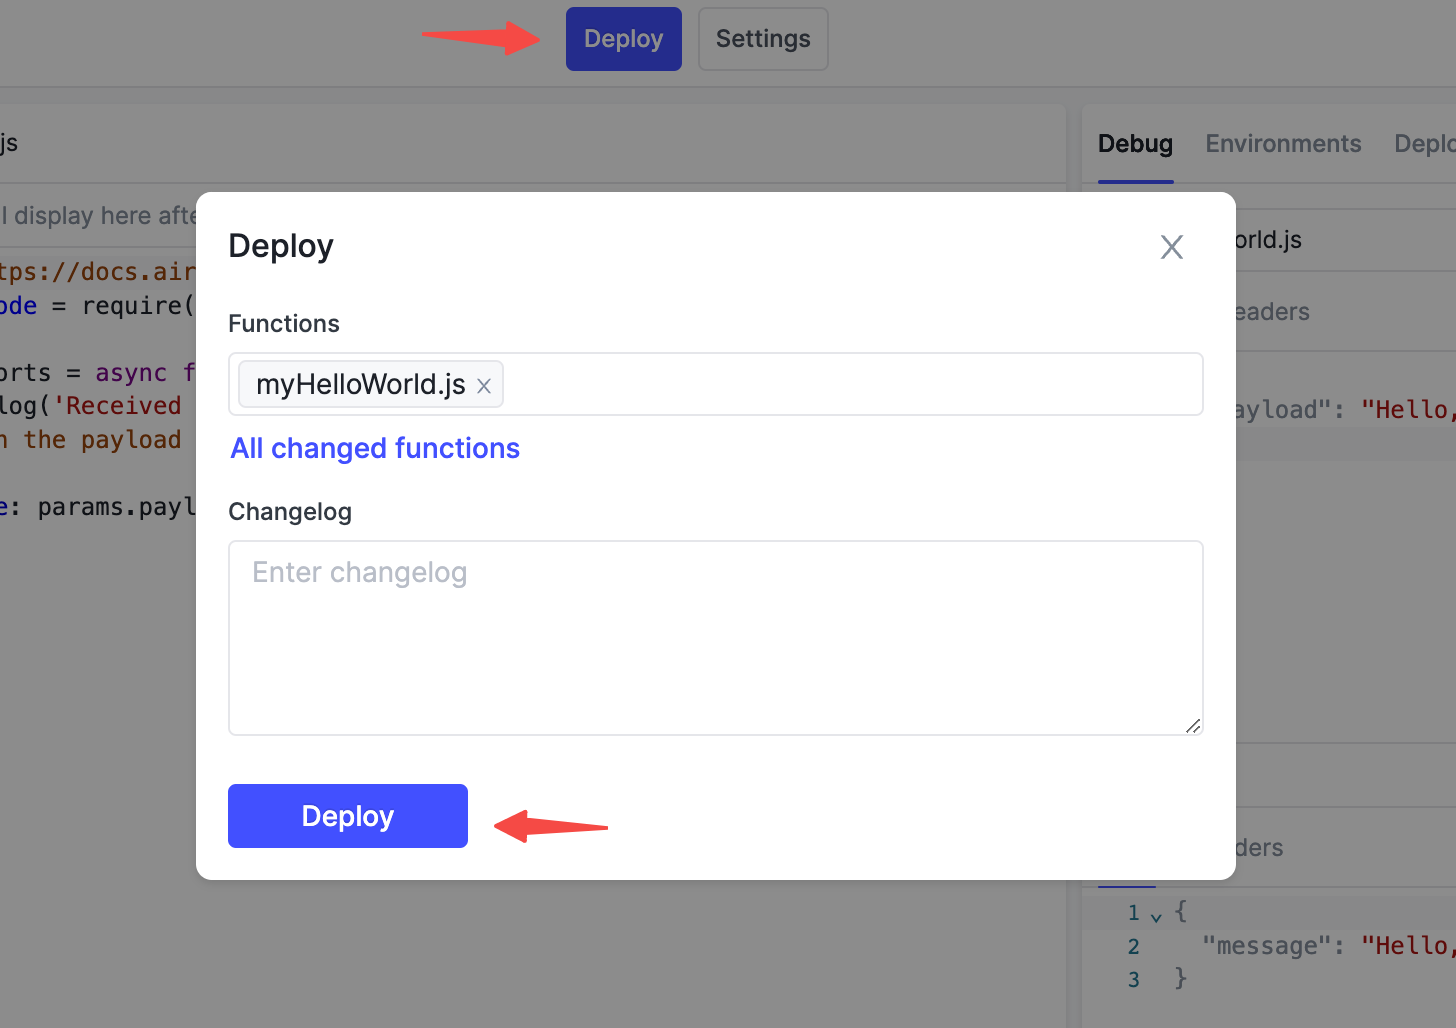
Deploy a Function
After finishing the development, we need to deploy it, and then we can invoke it in reality.
Click the Deploy button in the top bar, keep the options in the pop-up window unchanged, and click Deploy.
After the deployment is successful, an online URL of the function will appear below the function name. Click to copy it to the clipboard.
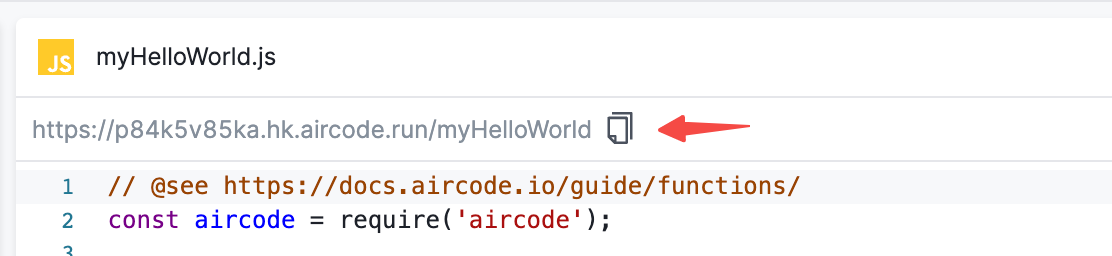
You can access this URL directly through the browser. To pass parameters, add params in the form of ?key=value to the URL, e.g.:
https://sample.hk.aircode.run/myHelloWorld?payload=hello
https://sample.hk.aircode.run/myHelloWorld?payload=hello
Or directly check out our runnable example:
What's Next?
Congratulations on developing and deploying your first cloud function. In regards to the method of creating robots in real-life scenarios using AirCode, we have prepared a series of hands-on practical tutorials.
If you want to learn more about how to utilize various features in AirCode in detail, you can refer to the following guides.